

Metal roof panel replacement is the process of removing damaged panels and installing new ones using proven techniques that deliver long-term weather resistance and structural safety. Done correctly, a metal roof lasts 40–70 years, making it one of the most cost-effective roofing investments available to Dallas Fort Worth homeowners and property managers. The key variables are material selection, proper fastening, and following a disciplined installation sequence. Skip any one of those, and you trade a 50-year roof for a 10-year headache. This guide walks you through every step, from tools to maintenance, so you get it right the first time.
What tools and materials do you need for metal roof panel replacement?
Preparation determines the quality of the finished roof. Showing up without the right tools wastes time and risks damaging new panels before they are even installed.
Essential tools
- Drill or impact driver with a torque-limiting clutch to control fastener depth
- Metal snips or aviation shears for straight and curved cuts
- Nibblers for longer panel cuts without heat buildup
- Chalk line for marking straight layout lines across the deck
- Measuring tape (at least 25 feet) for accurate panel positioning
- Safety harness and roof anchors rated for your body weight plus tools
- Torque-limiting screw gun to prevent over-driving fasteners
Required materials
| Material | Purpose |
|---|---|
| Matching replacement panels | Restore weather-tight coverage |
| Butyl tape or sealant | Seal overlaps and seams against water intrusion |
| Fasteners with neoprene washers | Secure panels while maintaining a watertight seal |
| High-temp synthetic underlayment | Moisture barrier that handles thermal cycling |
| Flashing and trim | Protect edges, valleys, and penetrations |
Synthetic underlayment outperforms traditional felt paper in heat resistance and durability, which matters greatly in Texas summers where roof surface temperatures regularly exceed 150°F. Felt paper degrades under those conditions and shortens the life of the entire system.
Pro Tip: Match your replacement panels to the existing profile, thickness, and coating before ordering. A panel that is close but not identical creates gaps at overlaps and voids manufacturer warranties.
Replacement panel costs range from $7 to $14 per square foot in 2026, depending on panel type and roof condition. Budget for 10–15% overage to account for cuts and waste. Check current DFW building code requirements before purchasing materials, as local wind uplift ratings affect fastener schedules and underlayment specs.
How do you inspect and prepare your roof before replacing metal panels?
A thorough inspection before any panel comes off protects you from discovering hidden problems mid-project. Skipping this step is the most expensive mistake a homeowner can make.
- Identify damaged panels. Look for rust streaks, warped or buckled sections, chalking on the panel surface, loose fasteners, and any interior water stains that trace back to specific roof zones.
- Inspect the roof deck. Press firmly on the decking around damaged panels. Soft or spongy spots signal rot that must be repaired before new panels go down.
- Decide: recover or full tear-off. Recover systems save on labor and disposal costs but require a structurally sound deck. Full tear-offs allow a complete deck inspection and are the safer choice when rot is suspected.
- Clear the work area. Remove debris, sweep the deck clean, and repair any damaged sheathing sections with matching plywood or OSB.
- Square the roof using the 3-4-5 method. Measure 3 feet along the eave, 4 feet up the rake, and confirm the diagonal is 5 feet. This confirms your layout lines are square before the first panel drops. The most common installation error is skipping this step, which causes panels to drift and creates gaps at seams.
- Pull permits if required. Many DFW municipalities require a permit for panel replacement that exceeds a certain square footage. Call your local building department before starting.
Pro Tip: Take photos of every damaged area before removal. Those images are invaluable if you file an insurance claim for storm-related damage.
What is the step-by-step process for replacing metal roof panels correctly?
This is where precision pays off. Follow each step in order. Rushing the sequence creates problems that show up as leaks months later.
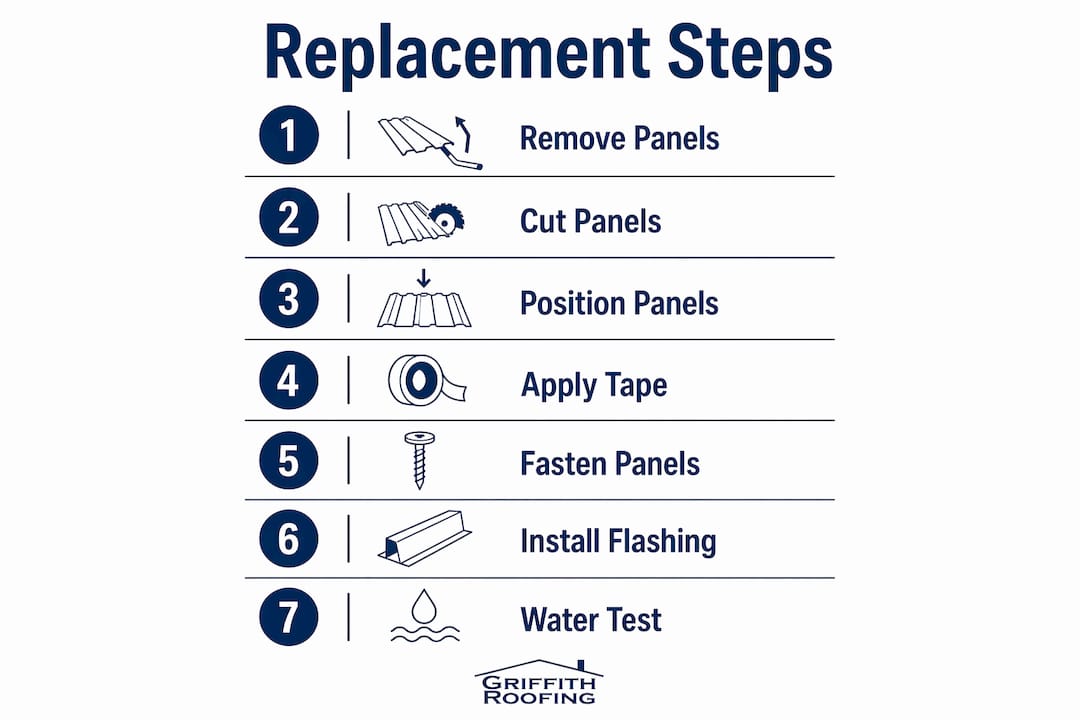
Step 1: Remove damaged panels carefully
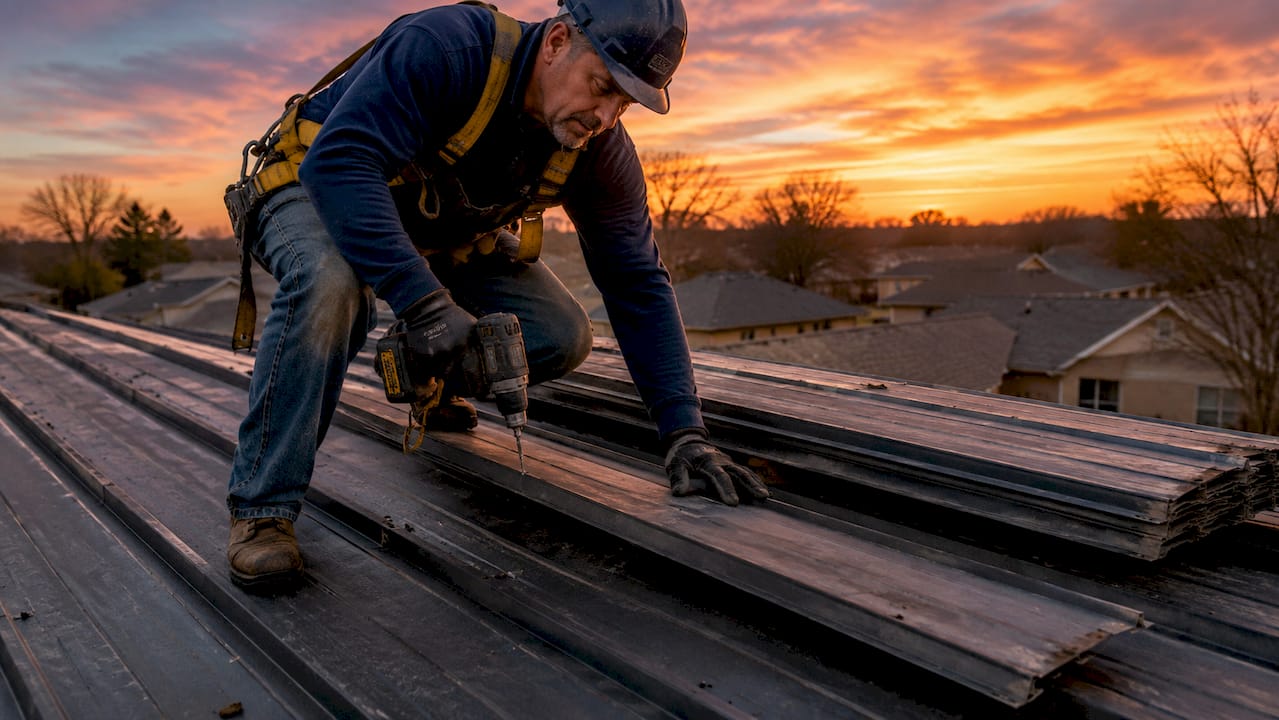
Start at the ridge and work toward the eave. Remove fasteners with a drill set to reverse, and lift panels straight up to avoid bending adjacent panels. On standing seam systems, single panel replacement requires mechanical seam disengagement tools and is rarely a DIY task. Exposed fastener panels are far more forgiving for experienced homeowners.
Step 2: Cut replacement panels with the right tools
Use nibblers or shears to cut metal panels, never abrasive grinders. Grinders generate heat that damages Galvalume and protective coatings, and the metal shavings they produce settle into panel seams and rust within weeks. Measure twice, cut once, and deburr all cut edges with a file.
Step 3: Position panels with correct overlap and alignment
Lay the first panel against your chalk line. The standard side lap is one full corrugation or rib, depending on your panel profile. Check alignment at the eave and ridge before driving a single fastener.
Step 4: Apply butyl tape on overlaps and seams
Apply butyl tape to all side laps and end laps before the panels come together. Butyl tape compresses as fasteners are tightened, forming a continuous seal that caulk alone cannot match. Do not substitute silicone here. Silicone fails under thermal movement.
Step 5: Fasten panels at the correct spacing and torque
Space fasteners 12–18 inches apart along each panel rib. Drive each screw until the neoprene washer just begins to mushroom outward. That slight compression creates a watertight seal. Over-tightening crushes the gasket and creates a leak point. Under-tightening leaves a gap. Both failures show up as water intrusion within one rain cycle.
Step 6: Install flashing and trim
Flashing at rakes, eaves, ridges, and any penetrations is not optional. It is the last line of defense against wind-driven rain. Use the same metal alloy as your panels to prevent galvanic corrosion where dissimilar metals contact each other.
Step 7: Perform a water test and final inspection
Run a garden hose across the roof from eave to ridge while someone checks the attic for drips. Mark any wet spots and re-examine the fasteners and seams in those zones before calling the job complete.
Pro Tip: For a side-by-side look at how exposed fastener and standing seam systems differ in replacement complexity, the standing seam roofing guide from Griffith roofing breaks down the key differences clearly.
| Panel type | DIY feasibility | Special tools required |
|---|---|---|
| Exposed fastener | Feasible for experienced DIYers | Standard drill, snips, screw gun |
| Standing seam | Professional recommended | Mechanical seaming and disengagement tools |
Exposed fastener panels suit experienced DIYers, while standing seam systems demand professional tools and expertise that most homeowners do not have on hand.
What common mistakes should you avoid during metal roof panel replacement?
Most roof failures trace back to a short list of repeatable errors. Knowing them in advance keeps your project off that list.
- Over-tightening fasteners. Crushing the neoprene washer destroys the seal. Use a torque-limiting screw gun and stop when the washer mushrooms slightly.
- Under-tightening fasteners. A loose screw backs out under thermal expansion and leaves a hole. Check every fastener after the first hot day.
- Using abrasive grinders to cut panels. The heat damages protective coatings and the swarf rusts into the panel surface within weeks. Use nibblers or aviation shears every time.
- Skipping underlayment. Underlayment is your backup layer when a fastener fails or a seam shifts. Removing it to save money removes your safety net.
- Installing panels out of square. Drifting panels create widening gaps at the ridge. The 3-4-5 squaring method takes five minutes and prevents hours of rework.
- Overlapping panels in the wrong direction. Always lap panels so the upper panel sheds water over the lower one. Reversing this channels water into the seam.
Pro Tip: If you find a leak after installation, trace it uphill from the wet spot. Water travels along rafters and decking before dripping, so the leak source is almost always higher than where it appears inside.
For rust spots on existing panels, wire brush the area, apply a rust-inhibiting primer, and seal with a compatible metal roof coating. Stripped screws pull out cleanly with a screw extractor and replace with the next size up in the same hole.
How do you maintain metal roof panels for long-term durability?
A replaced panel is only as good as the maintenance program behind it. DFW’s hail seasons, high winds, and extreme heat cycles demand a consistent inspection schedule.
- Inspect annually, ideally in the spring after hail season and again in the fall before winter storms. Focus on fastener heads, sealant condition, and panel edges.
- Clear debris after every major storm. Leaves and branches trap moisture against panel seams and accelerate rust. A soft-bristle broom or leaf blower handles most debris safely.
- Check for rust at cut edges and fastener holes. Touch up bare metal with a zinc-rich primer within the same season you spot it.
- Watch for panel movement at the ridge. Metal expands and contracts with temperature swings. Panels that have shifted off their original alignment need re-fastening before the next storm season.
- Reseal any sealant that shows cracking or separation. Butyl tape lasts longer than caulk, but caulk at trim and flashing joints typically needs attention every 5–7 years.
- Call a licensed contractor when you see multiple fasteners backing out across a large area, widespread rust, or panel deformation after a hail event. Those signs indicate systemic issues beyond a spot repair.
For a detailed look at how metal roof costs and panel types affect long-term maintenance budgets, Griffith roofing’s 2026 guide breaks down the numbers by system type. A step-by-step replacement guide from a southern U.S. climate perspective also offers useful context on maintenance timelines for hot, humid regions similar to North Texas.
Key Takeaways
Successful metal roof panel replacement depends on correct fastener torque, proper panel squaring, and synthetic underlayment. Skipping any one of these three steps creates leaks that shorten roof life by decades.
| Point | Details |
|---|---|
| Lifespan depends on technique | Correct installation delivers 40–70 years of service; shortcuts cut that in half. |
| Fastener torque is critical | Neoprene washers must mushroom slightly. Over or under-tightening causes leaks. |
| Always square the roof first | The 3-4-5 method prevents panel drift and gaps that no sealant can fix later. |
| Choose the right cutting tool | Nibblers and shears protect panel coatings; abrasive grinders cause rust within weeks. |
| Standing seam needs a pro | Mechanical seaming tools and expertise make standing seam replacement unsuitable for DIY. |
What I have learned after 20+ years of metal roofing in Texas
After two decades of replacing metal panels across the Dallas Fort Worth Metroplex, the pattern I see most often is this: homeowners wait too long. A single warped panel with a backed-out fastener turns into a rotted deck section by the time the interior water stain appears. The repair that would have cost a few hundred dollars becomes a structural project costing several thousand.
The second thing I have learned is that the DIY conversation is more nuanced than most guides admit. Exposed fastener panels are genuinely manageable for a careful, experienced homeowner who respects the safety requirements and takes the time to square the roof properly. Standing seam is a different animal entirely. I have seen experienced contractors struggle with mechanical seam disengagement on older systems. A homeowner attempting that without the right tools risks destroying adjacent panels that were perfectly fine.
My honest recommendation: if you have exposed fastener panels and you are comfortable on a roof with a proper harness, a targeted panel replacement is a reasonable weekend project. If you have standing seam, or if your deck inspection reveals rot, call a licensed contractor. The cost of professional installation is far lower than the cost of fixing a DIY repair that failed.
Quality materials matter as much as technique. Galvalume panels with a high-quality factory coating outperform bare steel in DFW’s hail and UV environment. Pair them with synthetic underlayment and correctly torqued fasteners, and you have a roof that genuinely lasts a generation.
— Mark Griffith
Griffith roofing’s metal roofing services for DFW homeowners
Griffith roofing has served Dallas Fort Worth homeowners and property managers since 2001, and metal panel replacement is one of our most requested services after storm season.
Our team inspects your existing deck, matches your panel profile exactly, and installs every fastener to the correct torque spec. We handle permit coordination, underlayment, flashing, and final water testing so nothing gets skipped. For homeowners managing the cost of a full replacement, Griffith roofing offers flexible financing options that fit a range of budgets. Explore our metal roofing solutions or contact us directly for a no-obligation inspection and quote.
FAQ
How much does metal roof panel replacement cost per square foot?
Metal roof panel replacement costs $7–$14 per square foot in 2026, depending on panel type, roof condition, and labor rates in your area.
Can I replace metal roof panels myself?
Exposed fastener panels are DIY-feasible for experienced homeowners with proper safety gear. Standing seam systems require mechanical seaming tools and professional expertise.
How far apart should fasteners be spaced on a metal roof?
Fasteners should be spaced 12–18 inches apart along each panel rib, with neoprene washers tightened until they just begin to mushroom for a watertight seal.
What is the best underlayment for metal roof replacement?
High-temperature synthetic underlayment is the correct choice for metal roofs. It handles thermal cycling far better than traditional felt paper, which degrades under the heat loads common in Texas summers.
How long does a properly replaced metal roof last?
A metal roof installed with correct materials and technique lasts 40–70 years. Regular annual inspections and prompt fastener maintenance keep it at the upper end of that range.


